In this article, we’ll show you how to configure Ascendix Search. If you haven't installed the app, here is a step-by-step Ascendix Search installation guide.
Let’s dive right in!
Preparing Your Salesforce
Ascendix Search Configuration
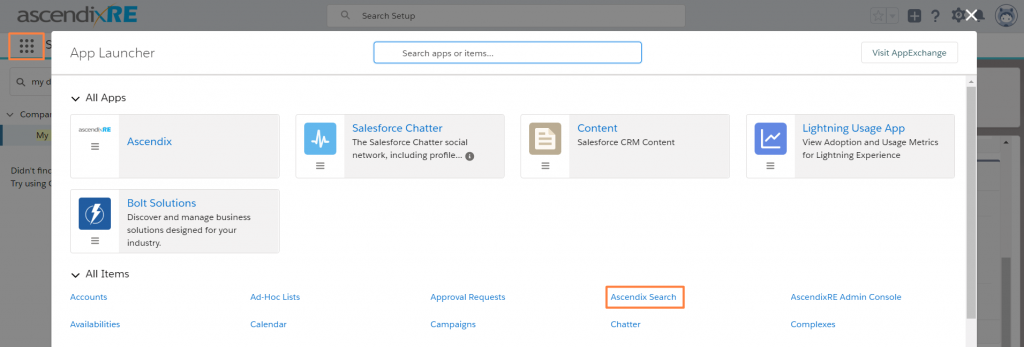
Once you installed Ascendix Search, you can start configuring the app. Click on the App Launcher and under All Items select Ascendix Search. Also, you can add Ascendix Search to the app ribbon bar.
Start off by accepting the License Agreement. Once accepted, select Save.
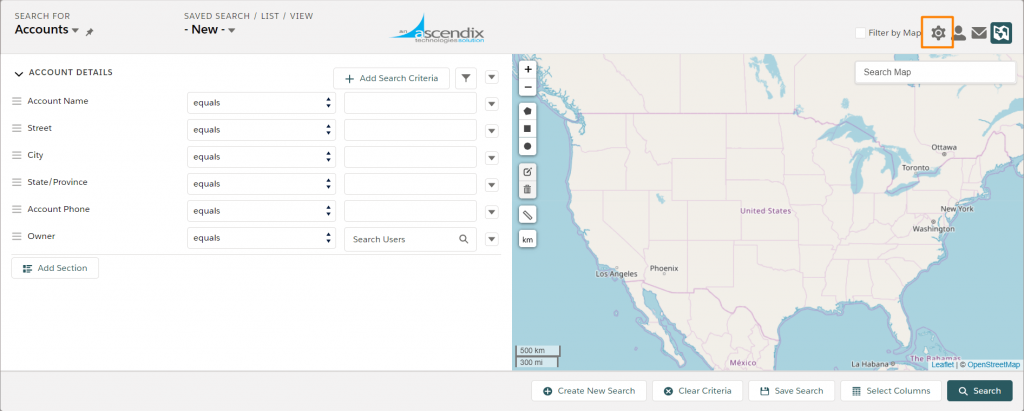
Now click on ⚙️ Settings on the right top corner of the app.
Completing Global Required Steps
Before we begin, please note that this is an important global step that needs to be completed to ensure everything works correctly.

Step 1: Edit OAuth Policies for the Connected App
- Navigate to Setup.
- Find and click on "Manage Connected Apps".
- Look for the "AscendixSearchOAuth" Connected App and click "Edit" next to it.
- In the OAuth Policies section, you'll see a setting for "Permitted Users"
- Change this setting from "All users may self-authorize" to "Admin approved users are pre-authorized".

6. Save your changes.
Step 2: Assign the Connected App to a Permission Set
- Go back to Setup.
- Find and click on "Permission Sets".
- Look for the copy of the "Ascendix Search User" permission set. If you don't see it, you'll need to clone it and name it AscendixSearchOAuth.

4. Find and click on "Assigned Connected Apps".
5. Assign the "AscendixSearchOAuth" Connected App to this permission set.

6. Save your changes.

Step 3: Assign the Permission Set to Users
1. If you cloned the "Ascendix Search User" permission set, make sure to assign this cloned version to all users who currently have the original "Ascendix Search User" permission set.

Enabling Searchable Objects
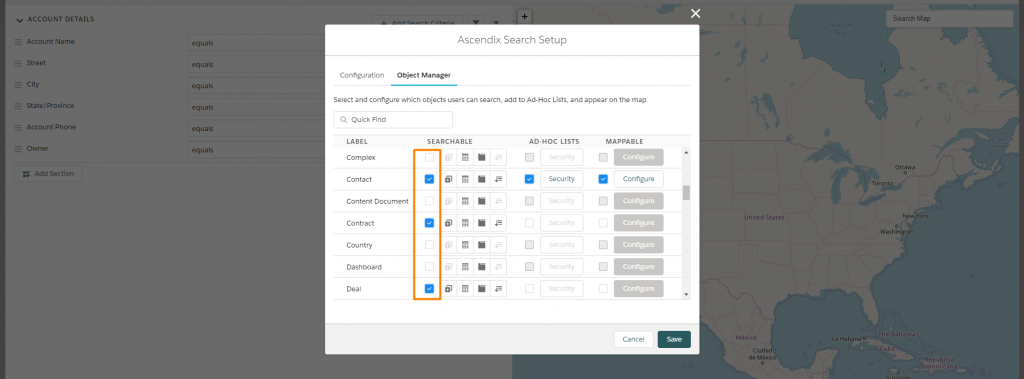
The first thing you want to do is to select and configure which objects users can search for. By default, Ascendix Search enables Accounts, Contacts, and Leads to be searchable.
Here is how to enable additional objects (both standard and custom ones):
Step 1: Select Object Manager Tab
Step 2: Check objects that should be available for search and click save
Enable Geocoding for Selected Objects
Ascendix Search can geocode your records and will let you search for data using maps. You should enable this feature for each object you wish to geocode:
Step 1: Navigate to Ascendix Search Setup ⚙️
Step 2: Select Object Manager Tab
Step 3: Select Mappable for the Objects you wish to geocode
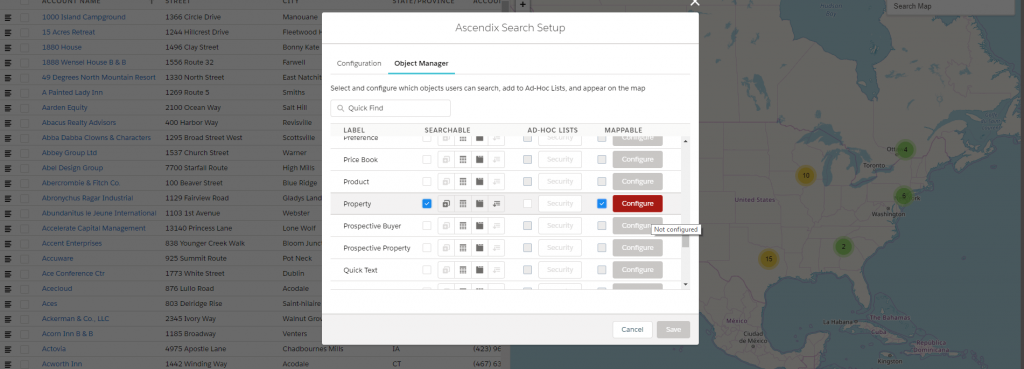
Step 4: Click Configure
Step 5: Select a geolocation field (select a field with the address)

Step 6: Click Ok and Save
By default, we use OpenStreetMaps as a map provider. It’s free and doesn’t require any additional setup. We also support Google Maps. Google Maps allows for up to 25,000 map loads per 24 hours and requires a key with an associated billing account.
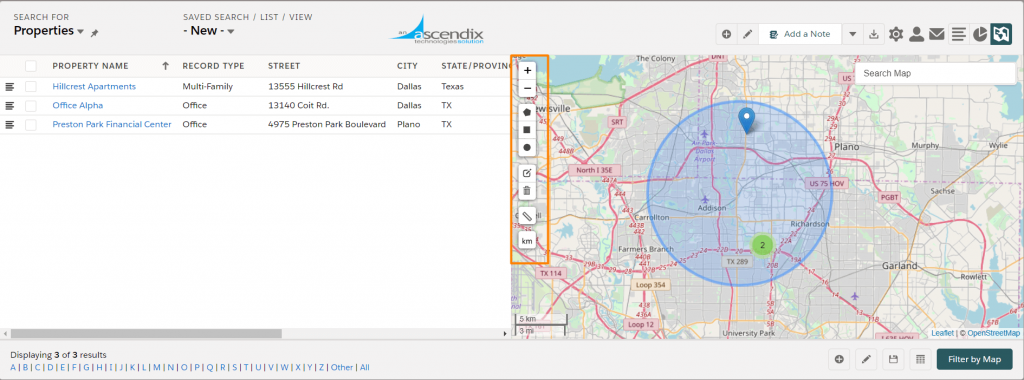
Salesforce geocodes Contacts, Accounts and Leads. If you wish to geocode other objects, you can turn on geocoding for custom objects.
Now you are ready to perform your first search!
Other Available Configurations
Using Ascendix Search Setup, you’ll be able to configure the following for each object:
- Enable/Disable Ad-Hoc Lists (this is your custom lists to help you categorize your records without having certain field values, e.g. baseball fans, or Dreamforce leads).
- Configure related lists displayed in the details area
- Configure default columns displayed in search results and related lists
- Configure custom tabs displayed in the details area
- Configure which fields are available to be used as search criteria and as results columns
Click on the corresponding icon and follow the instructions. These settings are optional and you can skip them.
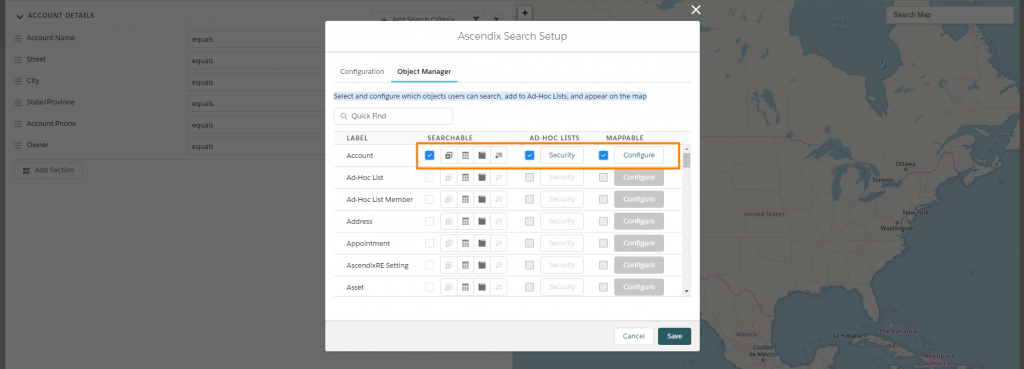
However, if you have multiple objects and fields, it is a good idea to define which fields, objects your users might need to decrease the number of choices.
That is it!